
Email Templates
Learn to create an Email template using the Netcore CE dashboard.
The Email Template section contains all the predefined templates or the ones you have previously created for your campaigns. You can easily browse these templates or create new, customized ones to suit your campaign's needs. Log in to the Netcore CE dashboard and navigate to Content > Email to create or use existing templates. Two types of templates are available here:
- HTML Templates: Create standard email templates with custom HTML for a fully customizable design and layout.
- AMP Templates: Build dynamic, interactive emails using AMP for enhanced user engagement and real-time content updates.
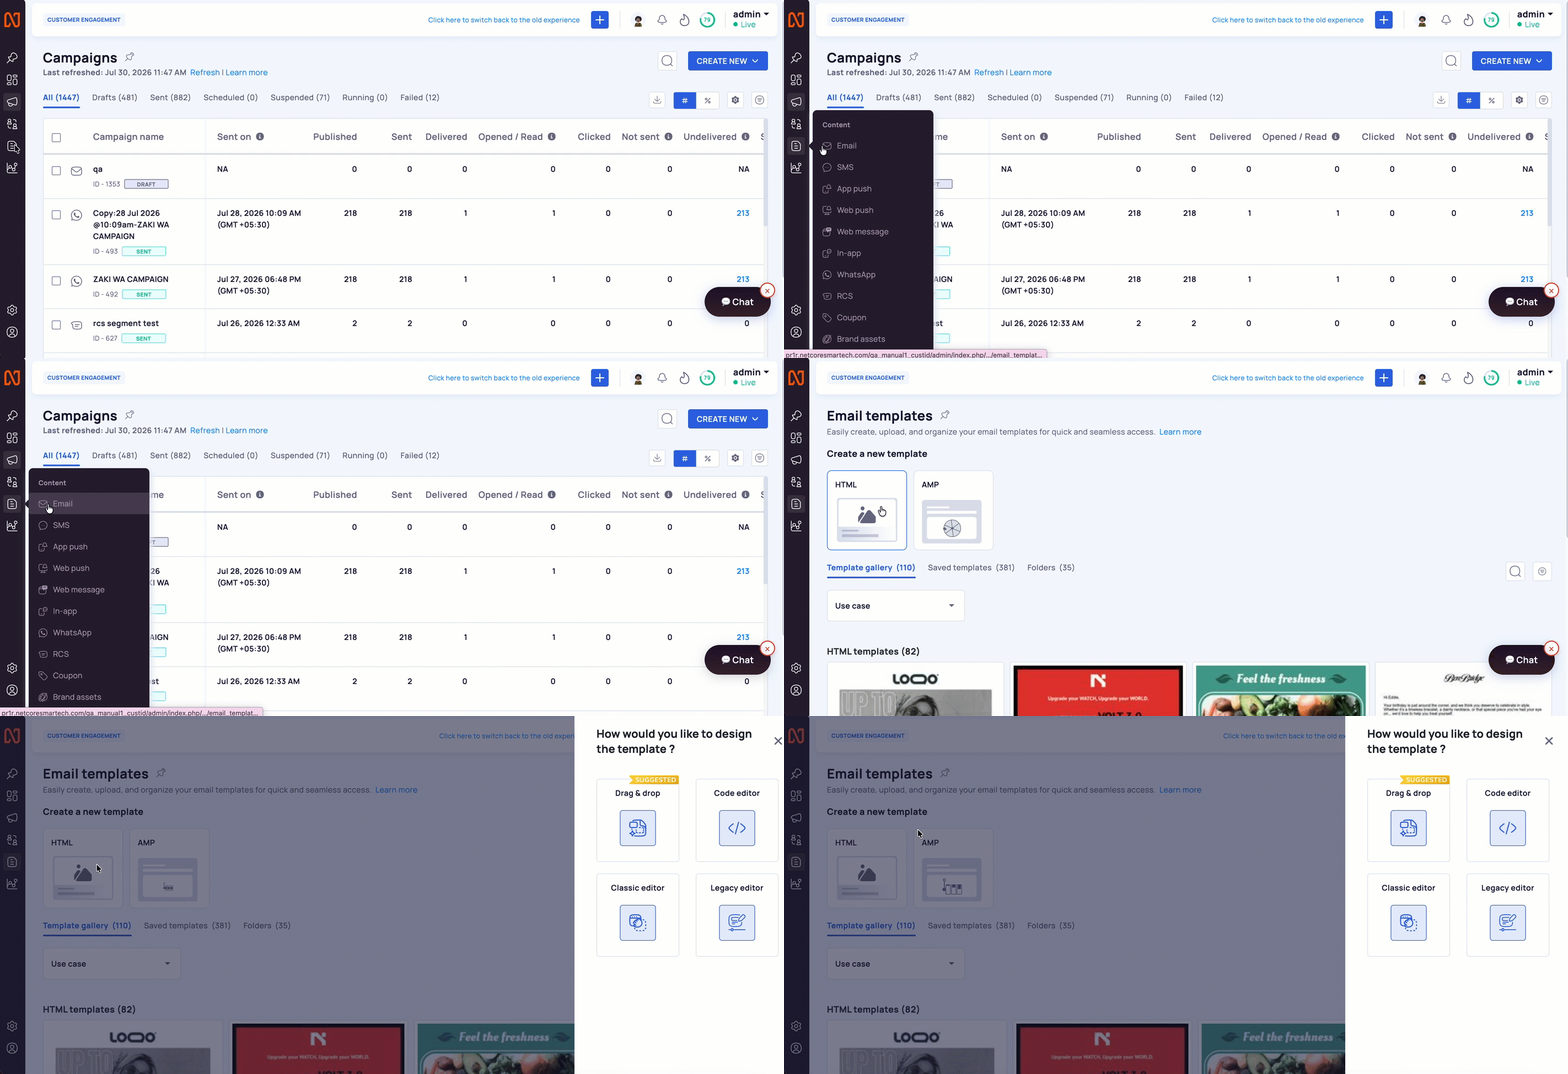
Navigate to Creating New HTML or AMP Template
HTML Templates
You can create a new HTML template using one of four updated methods, refer to the table below for the refreshed names:
| Editor | Description |
|---|---|
|
Drag & Drop Editor Previously: Unified Editor (UCE) |
Build responsive email templates from scratch using drag-and-drop elements. |
| Code Editor |
Upload or edit an HTML email template. Note: The filename must not contain ", ', /, \, &, |, ;, <, >.
|
|
Classic Editor Previously: Advanced Drag & Drop Editor |
Create email templates using the Classic Editor interface. |
|
Legacy Editor Previously: Drag & Drop Editor |
Continue working with templates created in the legacy editor. |
Code Editor
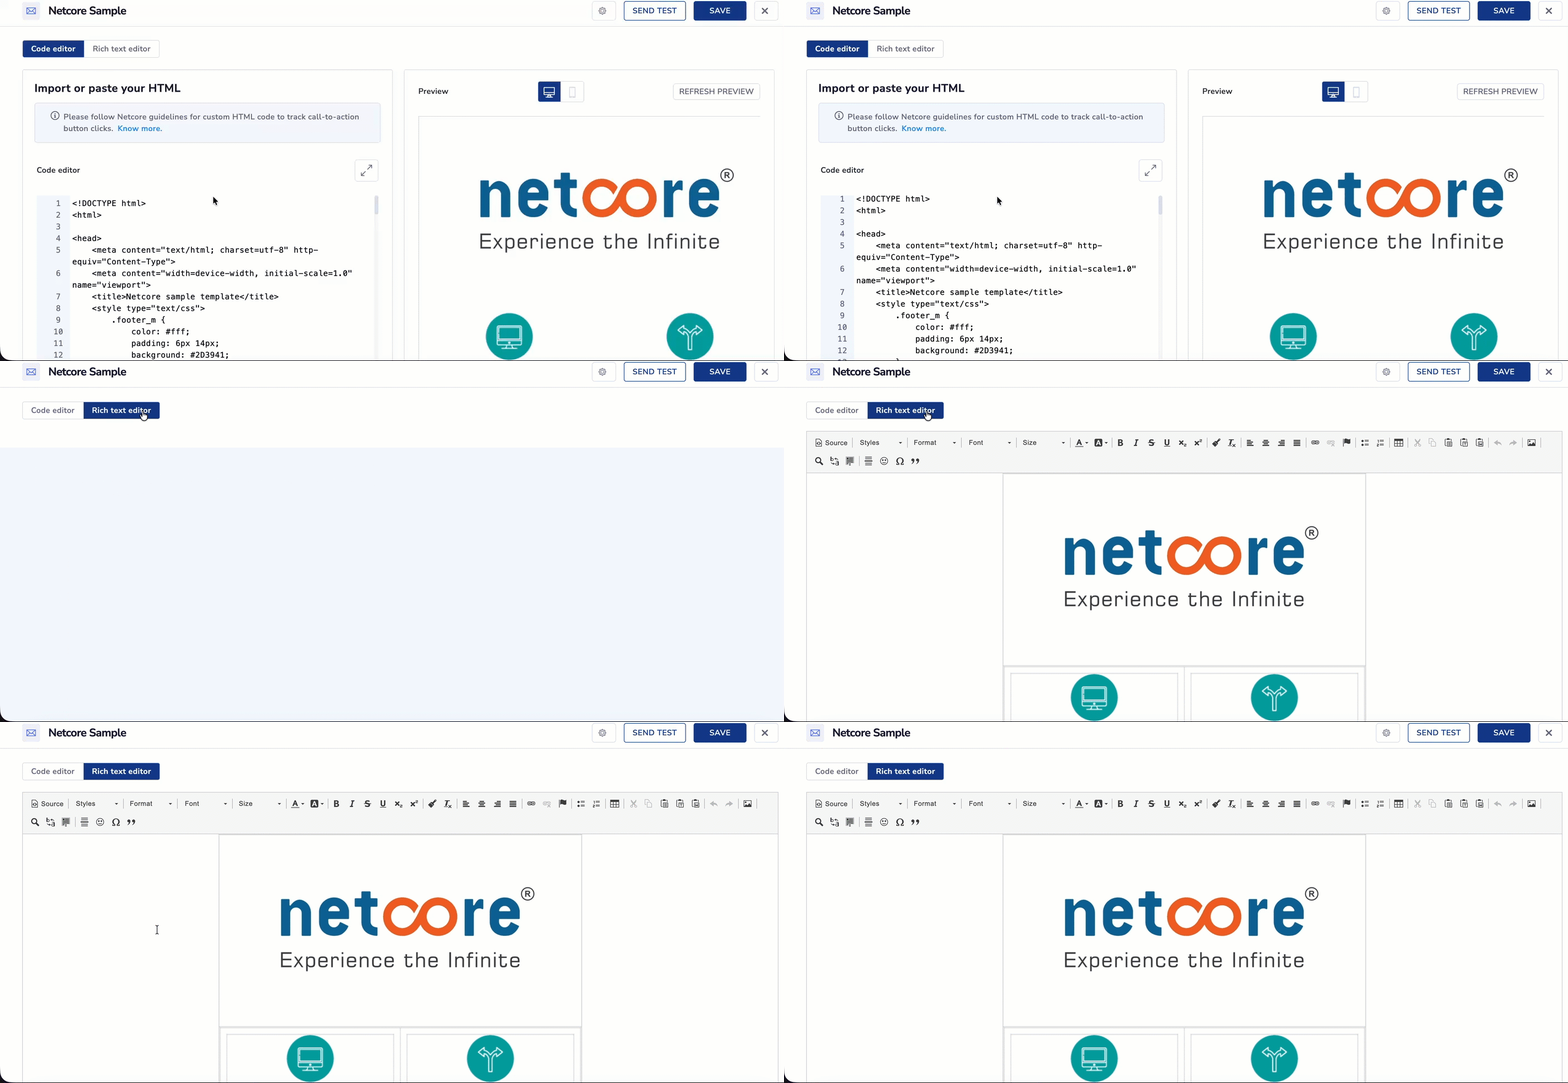
Code Editor Canvas to Create New Template
Refer to the table below for description of the Step by step process involved to create new template.
| Step | Description |
|---|---|
| Open the Code Editor | Select Code Editor while creating a new email template. |
| Import or Paste HTML | Upload an HTML file or paste HTML directly into the editor. |
| Preview the Email | Review the rendered email in the preview pane and switch between desktop and mobile views. |
| Refresh Preview | Refresh the preview after making changes to the HTML. |
| Switch to Rich Text Editor | Convert the HTML into the Rich Text Editor for visual editing. |
| Edit the Email | Modify content, formatting, images, and links using the editor. |
| Send a Test Email | Send a test email to verify rendering before saving. |
| Save the Template | Save the email template for future use. |
Classic Editor
Select Classic Editor to start creating your email template with a blank canvas. Select the below options to get started and click SAVE.
| Field | Description |
|---|---|
| Template Name | Enter a unique name for the email template. This name helps identify the template in the Saved Templates section. |
| Source of Attribute | Select the data source used for personalization attributes in the template. Once confirmed, this field cannot be edited. |
| Folder | Select the folder where you want to save the template. You can choose an existing folder, search for a folder, or create a new folder directly from the list. |
| Category | Assign one or more categories to organize and easily locate the template later. |
Once done, three sections are available when creating an email template in the Classic Editor. Drag and drop the elements on the canvas to create an email template.
Content: Contains basic elements like images, text, buttons, and more to build your email template.
Refer to the table below for details on all the elements available.
| Element | Description |
|---|---|
| Image | Select this option to add images to your email template. The options available here are
|
| Button | Select this option to create a clickable button that can be linked to a URL. |
| Table | Select this option to organize content in a structured grid layout, which is ideal for displaying data, pricing, or comparison charts. |
| Divider | Select this option to insert a horizontal line that visually separates sections of your email. |
| HTML | Select this option to add custom HTML code |
| Social | Select this option to include social media icons linked to your profiles. |
| Video | Select this option to embed video content within your email. |
| Icons | Select this option to add icons to your email |
| Text | Select this option to add and format text blocks within your email. |
| Product Collection | Select this option to showcase a group of products, providing users with a preview of multiple items within your email. |
| Product Recommendation | Select this option to display personalized product suggestions based on user behavior or preferences. |
| Product Catalog | Select this option to present a detailed listing of products, complete with images, descriptions, and prices. |
Rows: Includes different types of rows, such as saved, custom, and empty, to structure your template layout.
Rows
| Option | Description |
|---|---|
| Saved Rows | Select this option to save a row from your message for future use. Design your row, click the Save icon, name it, and drag it onto the canvas to reuse it in future campaigns. |
| Custom Rows | Select this option to use pre-designed rows that are available to all users. Simply drag and drop your chosen row onto the canvas, similar to how you use Saved Rows. |
| Empty | Select this option to drag and drop a blank row on the canvas |
Settings: Offers general options for customizing the template.
When creating an email template, various general settings are available to customize the elements, such as adjusting content width, alignment, background colors, fonts, and link colors. These settings allow you to edit the appearance and layout of your email. Refer to the table below for descriptions of these general settings.
| General Setting | Description |
|---|---|
| Content area width | Select this option to adjust the width of the content area in your email template. |
| Content area alignment | Select this option to align your content area to the left, center, or right within the template. |
| Background color | Select this option to set the overall background color of your email. |
| Content area background color | Select this option to change the background color within the content area. |
| Font | Select this option to choose the font style for the text in your email. |
| Link color | Select this option to set the color for hyperlinks in your email content. |
Test, Download & Save: Offers general options for customizing the template.
Settings : Opens the Template settings drawer
- Download: It downloads the template
- Send Test: It sends a test email of the current version
- Save: It saves the template
- Close: Exits the editor
Send Test
Selecting Send Test from the header opens the same test-send drawer used across the other editors:
-
Sender email and domain auto-fill from your account's default configuration.
-
You can use preset test addresses or enter up to 10 comma-separated recipients.
-
Test sends bypass blocklist/suppression rules and send a non-personalized version if the recipient isn't in your contact master.
Download
Download
The Download icon in the header lets you download the template directly from Classic Editor.
Save
Selecting Save saves the template. Based on the pattern confirmed elsewhere in this editor suite (drag-and-drop editor shows a "Template saved successfully" toast and returns to Content), Classic Editor is expected to behave the same way, but this hasn't been directly confirmed for Classic Editor specifically.
To learn how to create an email campaign step-by-step, check out this document.
Drag and Drop Editor
Build responsive email templates using a visual drag-and-drop interface. Simply add, arrange, and customize content blocks. Refer to the documentation here.
AMP Templates
AMP templates are designed to create interactive and fast-loading email content. These templates enable enhanced functionalities like carousels, forms, and real-time updates within the email.
- Drag & drop editor: AMP-capable version of the primary drag-and-drop editor
- Code editor: Import AMP HTML through an AMP file, or paste the code directly. Unlike the HTML Code editor, there's no URL import and no Zip import for AMP.
Follow these steps to create an AMP template.
- Click on Create a new AMP template or select from the gallery. The AMP Email template gallery screen appears.
- Choose any existing template or create a new one using the Blank canvas option.
Refer to the links below to create an AMP template using different methods:
Interactive Email Content
Interactive elements can be added to email campaigns using AMP capabilities.
- Forms: AMP Forms
- Countdown Timer: Countdown Timer
Updated 17 days ago