
Send Test Journey Node
Send Test Messages in Journey Builder in Netcore CE
Overview
The Send Test Message feature allows you to verify the email content, personalization, and configuration before activating the journey. This helps ensure that the message renders correctly and reaches the intended recipients.
You can use the Test option in two ways.
- Action Node: You can send test emails directly from the Action node on the Journey canvas:
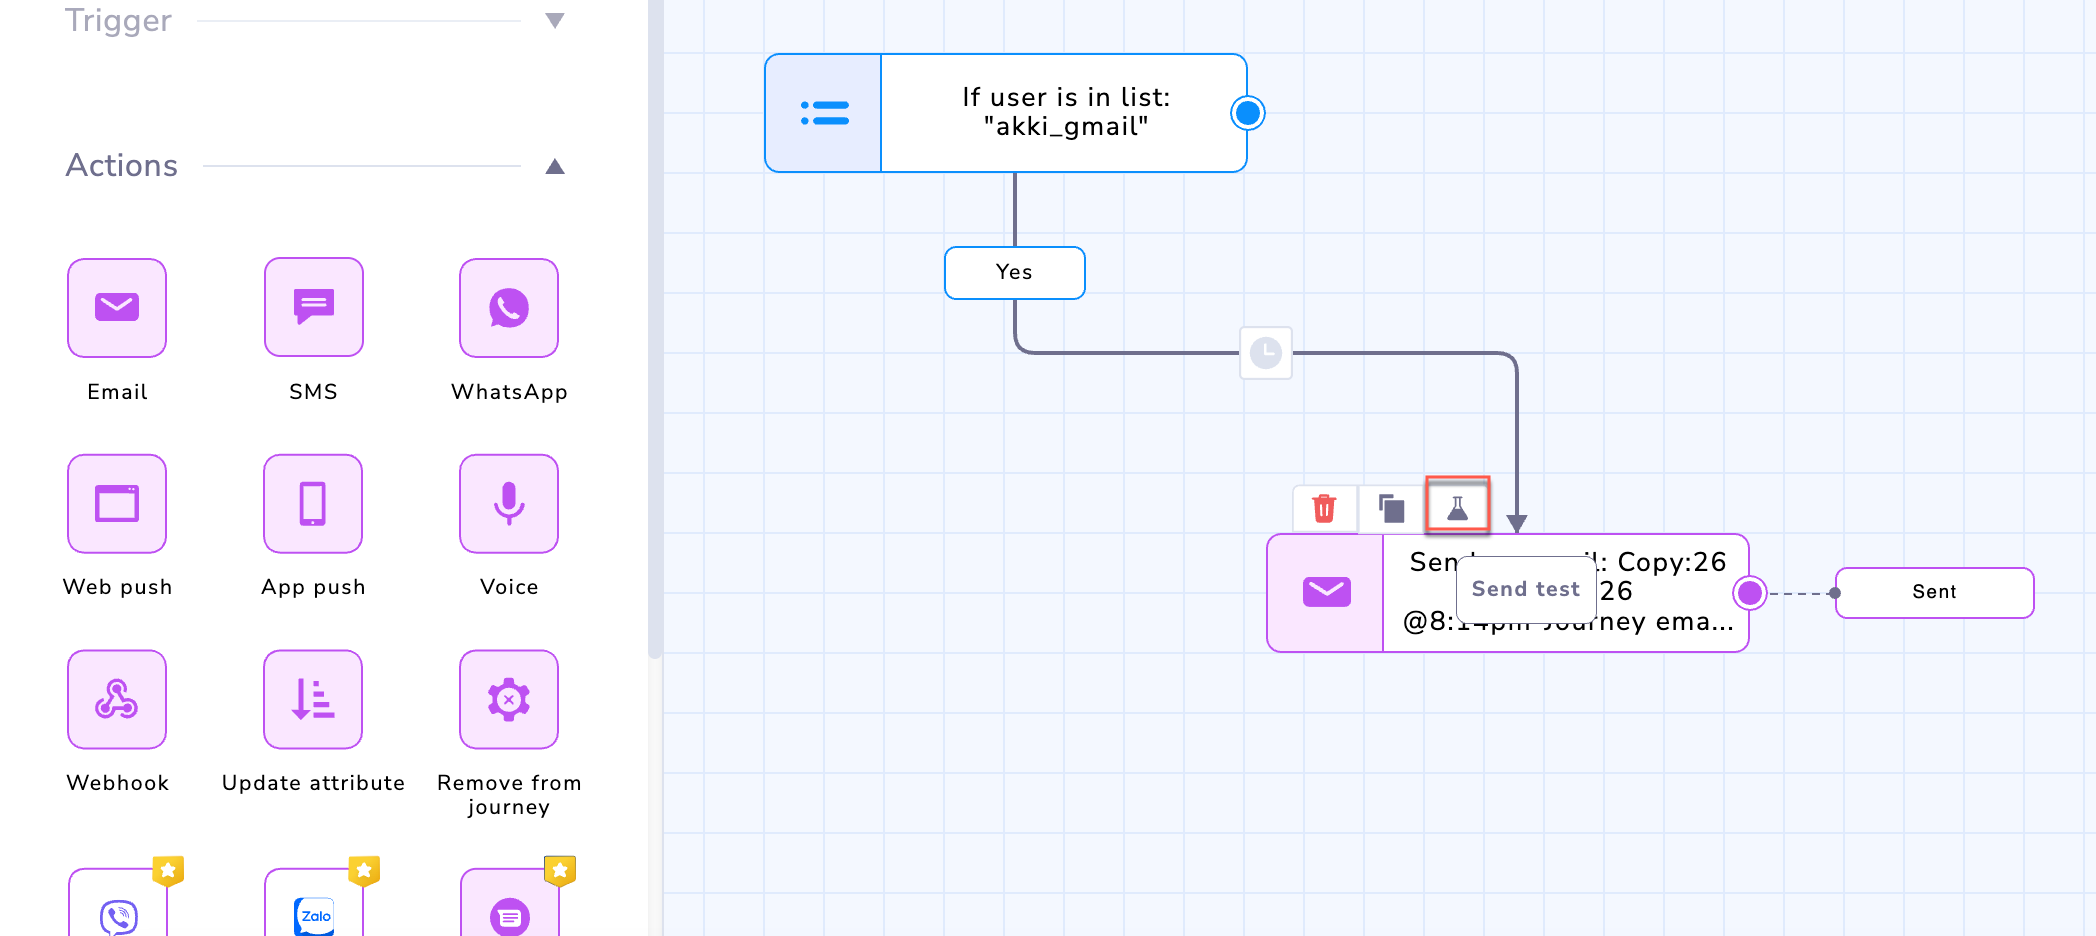
- Channel Specific Action node in the Journey Builder.
- Email Action Node
- App Push Action Node
- WhatsApp Action Node (coming soon)
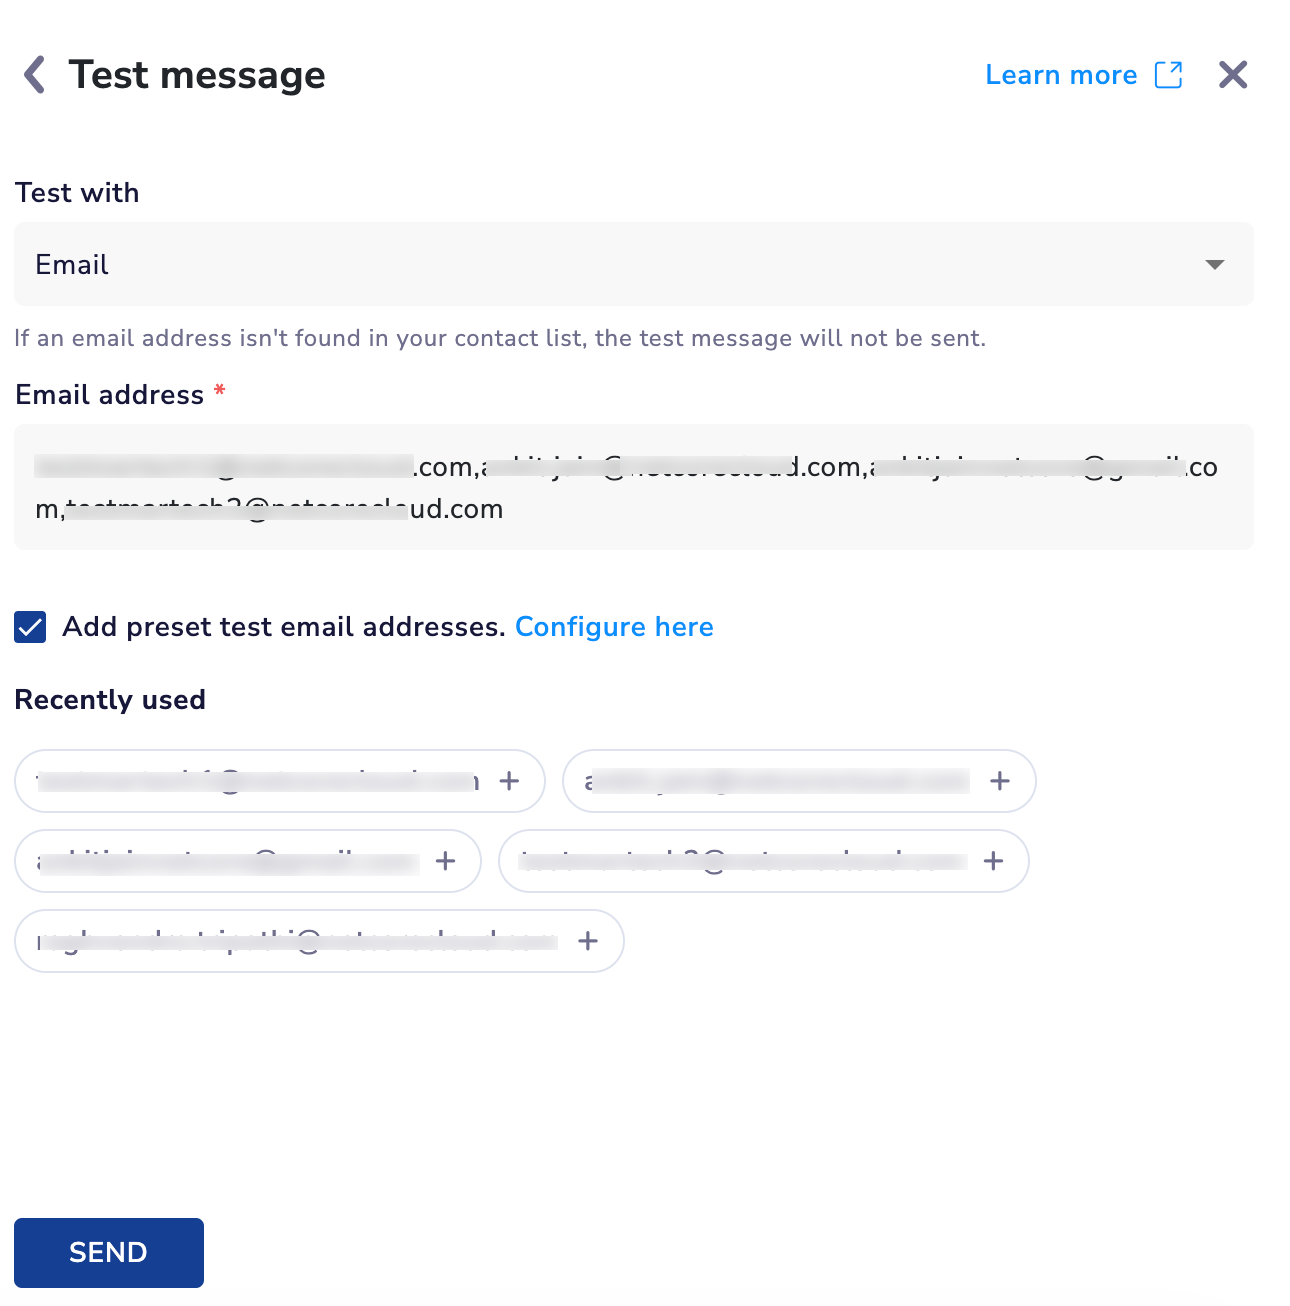
Configure Test message in Email Test node
Test Email Configuration
The test panel allows you to specify who should receive the test email.
| Field | Description |
|---|---|
| Test with | Defines the identifier used for testing. For email nodes, this is set to Email. |
| Email address | Enter the email addresses that should receive the test email. You can add up to 10 email addresses, separated by commas. You can update this in the Admin Configuration of the panel. |
| Preset Test Users | Preset test users help teams quickly test communications without manually entering email addresses each time. You can preset your emails from Account Configuration > Test Contact |
Recently used: You can add all the recently used emails from here without manually entering them.
NoteIf an entered email address does not exist in the contact database, the test email will not be sent to that address.
Send the Test Email
After entering the recipients in the Email bar, Click Send. The system processes the request and attempts to send the test email.
A confirmation screen will appear including success or failure details for each recipient.
Email Send Test: Failure Scenarios
Below are the scenarios where a Journey Node Send Test for Email can fail
- User Issues: A test email will fail if the user is anonymous and the anonymous feature is not enabled in the system.
- Personalisation / Attribute Issues: If there is an error while reading user attributes or event data from MongoDB, the test fails with a personalisation error.
- Template / Content Issues: If a merchandising template is used but the
mt_request_idis not set in Redis, the test will be skipped. - Recipient Validation Issues: The test fails when the email address is invalid or improperly formatted.
- Blacklisted contacts: The email is blocked if the recipient is unsubscribed or present in suppression lists.
- Product Recommendation Issues: The test fails if product or recommendation data cannot be retrieved.
- Coupon / Content Issues: The test fails when the coupon or dynamic content is invalid, missing, or exhausted.
- Gateway Issues: The test fails if the email service provider or gateway is unavailable or encounters errors.
- Backend Errors: Any internal service error or downtime leads to test failure.
Test App Push Configuration
Click Send Test to directly test the APN templates before making your journey live. Click the drop down menu of Test with to select between the two options below:
| Option | Description |
|---|---|
| Primary Key | Identify recipients using the account’s configured primary key, such as a customer ID, policy number, or email. |
| Push Token | Identify recipients using their email address registered in the system. |
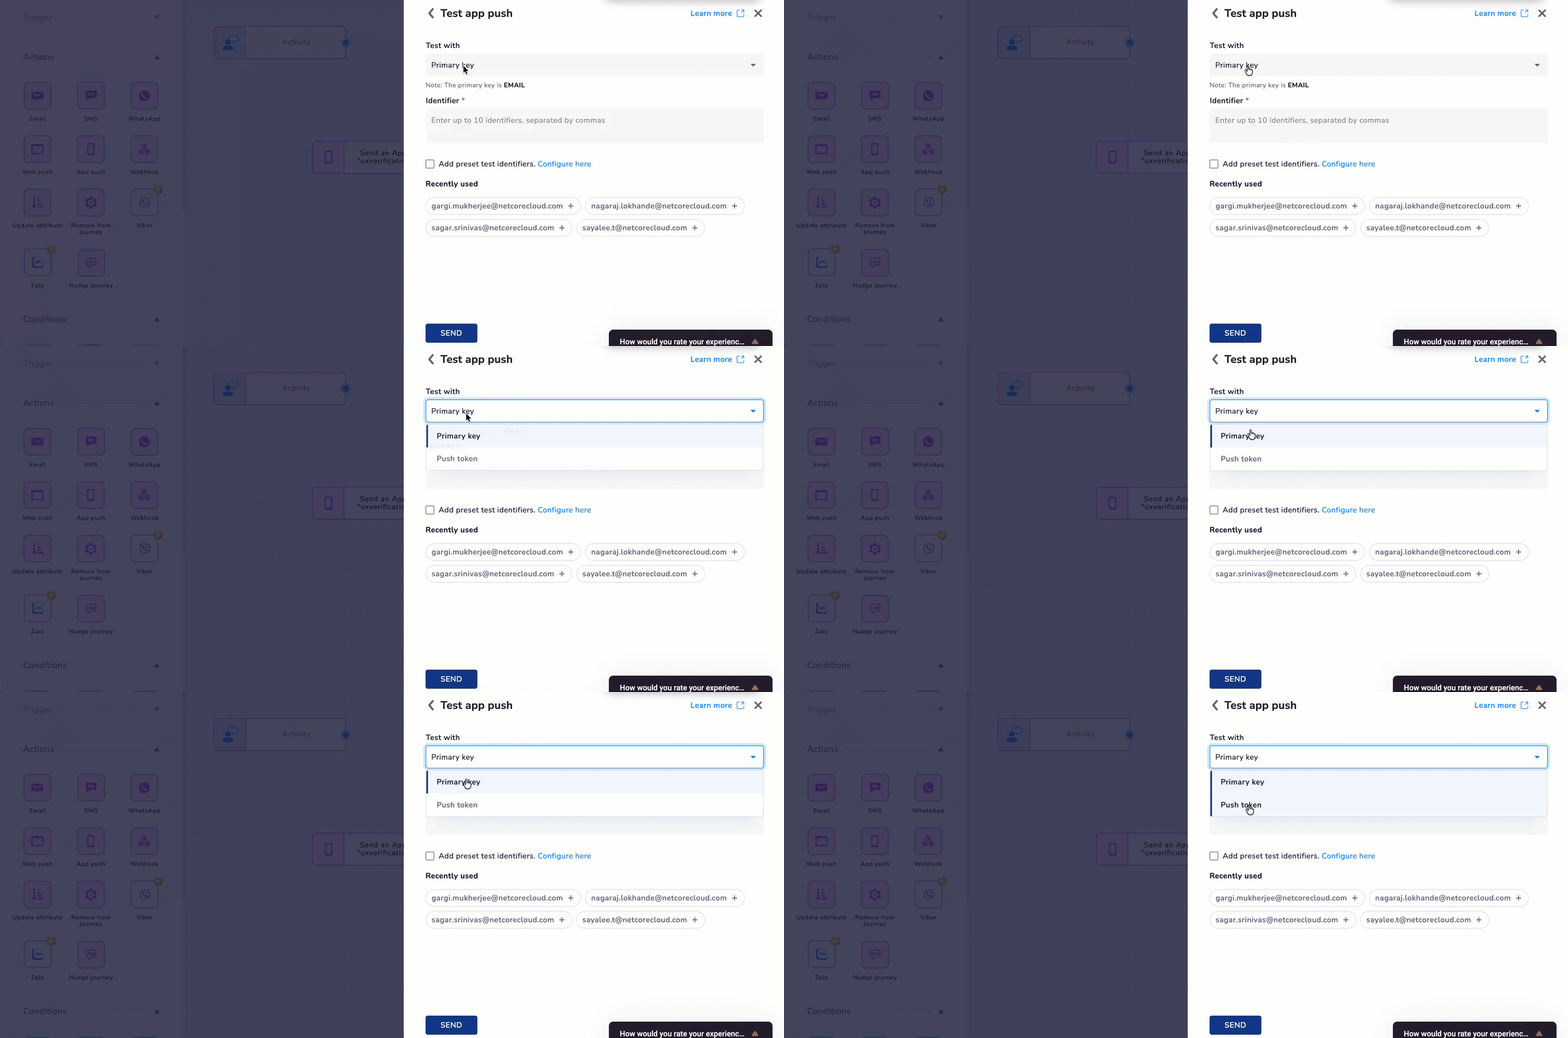
Send Test Message
Primary Key Configuration
The test panel allows you to specify who should receive the test App Push Notification when the Test with selection is Primary key. The Primary key here is Email
| Field | Description |
|---|---|
| Email address | Enter the email addresses that should receive the test email. You can add up to 10 email addresses, separated by commas. You can update this in the Admin Configuration of the panel. |
| Preset Test Users | Preset test users help teams quickly test communications without manually entering email addresses each time. You can preset your emails from Account Configuration > Test Contact |
Recently used: You can add all the recently used emails from here without manually entering them.
NoteIf an entered email address does not exist in the contact database, the test email will not be sent to that address.
Push Token Configuration
Use this option when you want to validate delivery to a known device without requiring the recipient to exist as a contact in the system.
Enter the Push token comma separated or select from recently used.
Good to KnowA push token is a unique device identifier generated by the mobile operating system (Android or iOS) that allows the push notification service to target a specific device.
Send the Test App Push
After configuring the Send Test tab with either Primary key or Push Token, Click Send. The system processes the request and attempts to send the test the App Push Notification.
A confirmation screen will appear including success or failure details for each recipient.
App Push Send Test: Failure Scenarios
Below are the scenarios where a Journey Node Send Test for App Push can fail.
- Message template not loaded: The selected App Push template could not be fetched or rendered. Verify that the template exists and is published.
- User attributes not loaded: The system could not retrieve user profile attributes required to render the notification. Check that the user exists and their profile data is populated.
- Invalid or incomplete message: The notification payload is missing required fields such as title, body, or deep link. Review the template configuration and ensure all mandatory fields are completed.
- Sandbox send limit reached: The test send limit for the account’s sandbox environment has been exceeded. Contact your account administrator to review sandbox quotas.
- No push token found: No valid device push token is associated with the identified user. Ensure the user has the app installed and has opted in to receive push notifications.
- Personalization / attribute error: A personalization tag in the template refers to a user attribute or event that is missing or could not be resolved for the test recipient.
- Liquid render failed: The template contains Liquid syntax that failed to render due to a syntax issue, unsupported function, or null value. Review the Liquid logic used in the template.
- No products found: The recommendation engine or product collection referenced in the template returned no products for the test recipient.
- Dynamic carousel validation failed: The dynamic carousel payload did not pass platform-specific validation checks. Review the carousel configuration for Android or iOS compatibility.
- Push not queued: The push notification could not be queued because the device platform, token, or routing configuration did not match the expected setup. Verify the push token and app platform.
- Test flag or request ID missing: An internal identifier required to process the test send is missing. Retry the test send. If the issue persists, contact support.
- Duplicate job suppressed: An identical test send request is already being processed. The duplicate request was suppressed to avoid duplicate delivery.
- Infrastructure or configuration issue: A backend issue such as a database failure, cache issue, configuration problem, or client restriction prevented the test send. Contact your Netcore CE administrator or support team.
Test WhatsApp Configuration
Click SEND TEST on the WhatsApp Action node to validate your template with real personalization before making your journey live.
To configure the Send Test node, refer to the table below:
| Field | Description |
|---|---|
| Test With | Specifies the identifier used for testing. For WhatsApp, this is Mobile Number. |
| Mobile Number(s) | Enter one or more mobile numbers separated by commas, or select numbers from the Recently Used section. |
| Add preset test mobile numbers | When enabled, automatically includes the preset test mobile numbers configured for your account. Click Configure here to manage the preset list. |
| Recently Used | Displays mobile numbers used in previous tests. Click a number to add or remove it from the current test. |
Validation for Test Recipients
- A test message is sent only to mobile numbers that exist in your contact list.
- If a mobile number is not found in your contact list, the test message wont be sent.
Send Test Message
After selecting the recipients, click Send. The system validates the request and attempts to deliver the WhatsApp test message.
Once processing is complete, a confirmation screen displays the delivery status for each selected recipient.
WhatsApp Send Test Failure Scenarios
A Send Test request can fail in the following scenarios:
| Failure Scenario | Description |
|---|---|
| Template not approved | The selected template is in Pending or Rejected status. Only approved templates can be tested. |
| Empty personalization value | A personalization attribute resolves to an empty value. Unlike live campaigns, test messages don't apply fallback values for this scenario, so Meta rejects the message. |
| Recipient not found | The manually entered mobile number doesn't exist in both Test Contacts and the Contact Master. |
| Personalization or attribute issues | A recommendation, product collection, event, or mapped attribute referenced by the template cannot be resolved for the selected recipient. |
Updated 25 days ago