
Import data to Netcore from Nitro
Connect NitroX with Netcore CE so that NitroX sends identified users and website events to your Netcore CE account.
Overview
After you enable the integration, NitroX starts exporting identified user data and supported website events to Netcore CE. You set up the connection in the NitroX dashboard. You need an API key and an Asset ID from Netcore CE.
End-to-end, the flow looks like this:
- Collect: copy your API key and Asset ID from Netcore CE.
- Connect: enter both values in the NitroX integration form, with your data center and primary identifier.
- Select events: choose the events that NitroX sends.
- Go live: save the integration. NitroX starts sending data.
Prerequisites
| Requirement | Details |
|---|---|
| NitroX account | Access to the NitroX dashboard at https://x.nitrocommerce.ai. |
| Netcore CE access | A Netcore CE login that can view Profile > User Profile and Settings > Website. |
| Customer ID in Netcore CE | Know whether your account uses phone number, email, or another key as the Customer ID. |
| Data center | Know the data center assigned to your Netcore CE account. |
Connect NitroX with Netcore CE
Step 1: Log in to NitroX
- Open the NitroX dashboard at
https://x.nitrocommerce.ai. - Log in with your NitroX credentials.
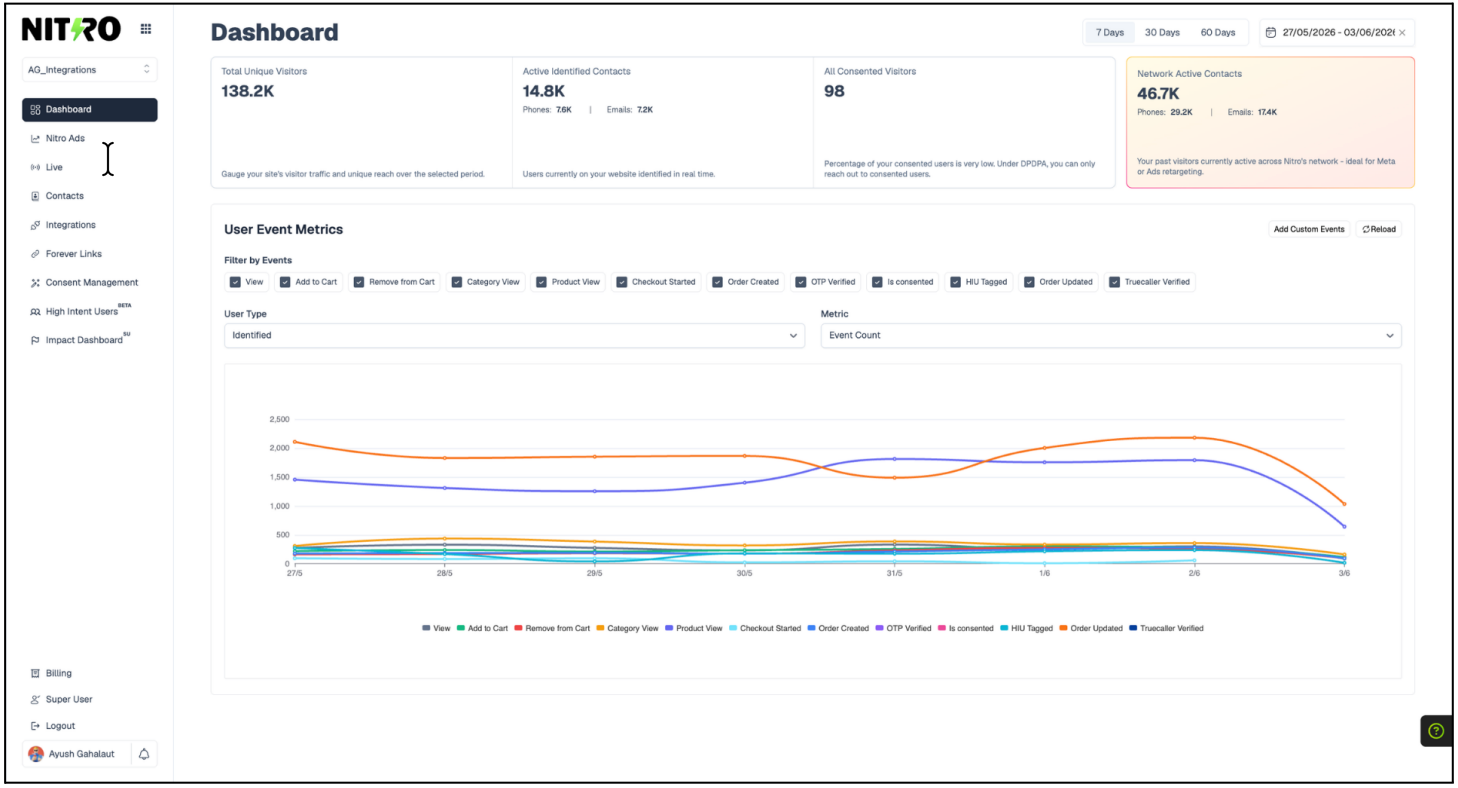
Log in to NitroX Dashboard
Step 2: Open the integration
- From the left-side menu, click Integrations.
- Scroll through the list of platforms and locate Netcore.
- Click the Netcore integration card. The setup form opens.
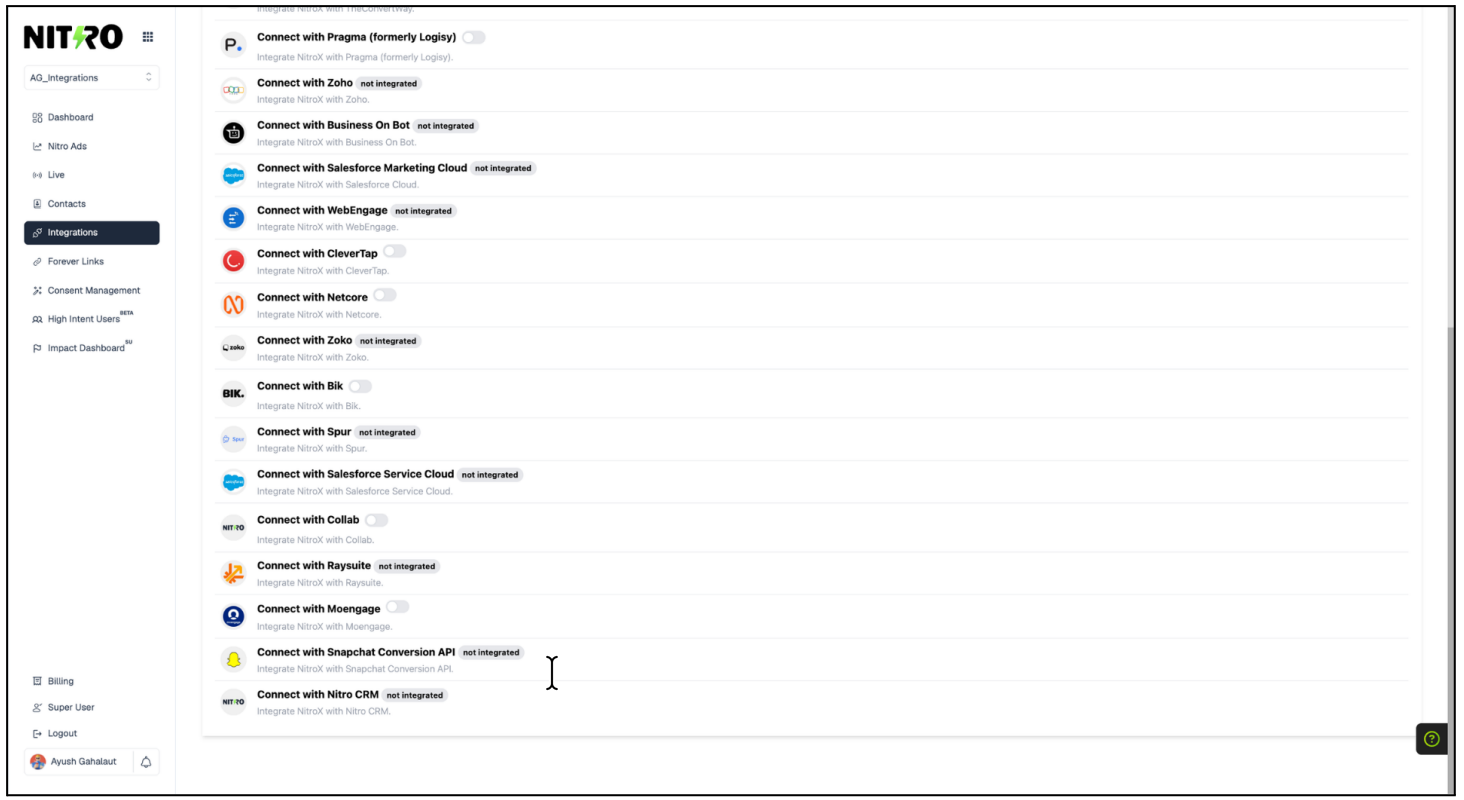
Locate Netcore Integration in the Nitro dashboard
The form asks for the following details.
| Field | What to enter |
|---|---|
| Data Center | The Netcore data center assigned to your account. |
| Primary Identifier | The Customer ID configured in Netcore CE. Usually this is the phone number or the email. |
| Asset ID | The Asset ID copied from Netcore CE. |
| API Key | The API key copied from Netcore CE. |
| Select Events | The events that NitroX sends to Netcore CE. |
Step 3: Copy your API key and Asset ID from Netcore CE
Open Netcore CE in a new browser tab and log in with your Netcore CE credentials.
Copy the API key
- From the left menu, go to Profile > User Profile.
- Locate the API key field.
- Click Copy.
Copy the Asset ID
- From the left menu, go to Settings > Website.
- Locate the website that you want to connect.
- Copy its Asset ID.
Paste both values into the NitroX form.
Step 4: Select the data center
Select the data center that Netcore CE allocated to your account.
Step 5: Select the primary identifier
Select the identifier that matches the Customer ID in Netcore CE.
| Option | When to select |
|---|---|
| Phone Number | Netcore CE uses the phone number as the Customer ID. |
| Netcore CE uses the email as the Customer ID. | |
| Anon ID | Netcore CE uses neither phone number nor email as the Customer ID. For example, it uses a unique key. |
NoteWhen you select Phone Number, NitroX exports phone numbers with the country code. Make sure Netcore CE stores phone numbers in the same format.
How NitroX uses the primary identifier
NitroX sends the identity value of each event based on your selection.
| Primary identifier | What NitroX exports |
|---|---|
| Phone Number | The phone number is the identity of the contact and the event. |
| The email address is the identity of the contact and the event. | |
| Anon ID | The Nitro ID is the anonymous ID of the contact and the event. |
About the Anon ID option
If you select Anon ID, NitroX creates anonymous user profiles in Netcore CE, along with customer PII. These profiles have two possible paths:
- They convert into identified audiences when the visitor logs in.
- They remain available under the anonymous users section for a defined period. You can use them for retargeting and activation.
Step 6: Select events
Under Select Events, tick the events that you want NitroX to send to Netcore CE. NitroX sends only the events you select.
For the list of events and their payloads, see Nitro event and contact payload reference.
Step 7: Save the integration
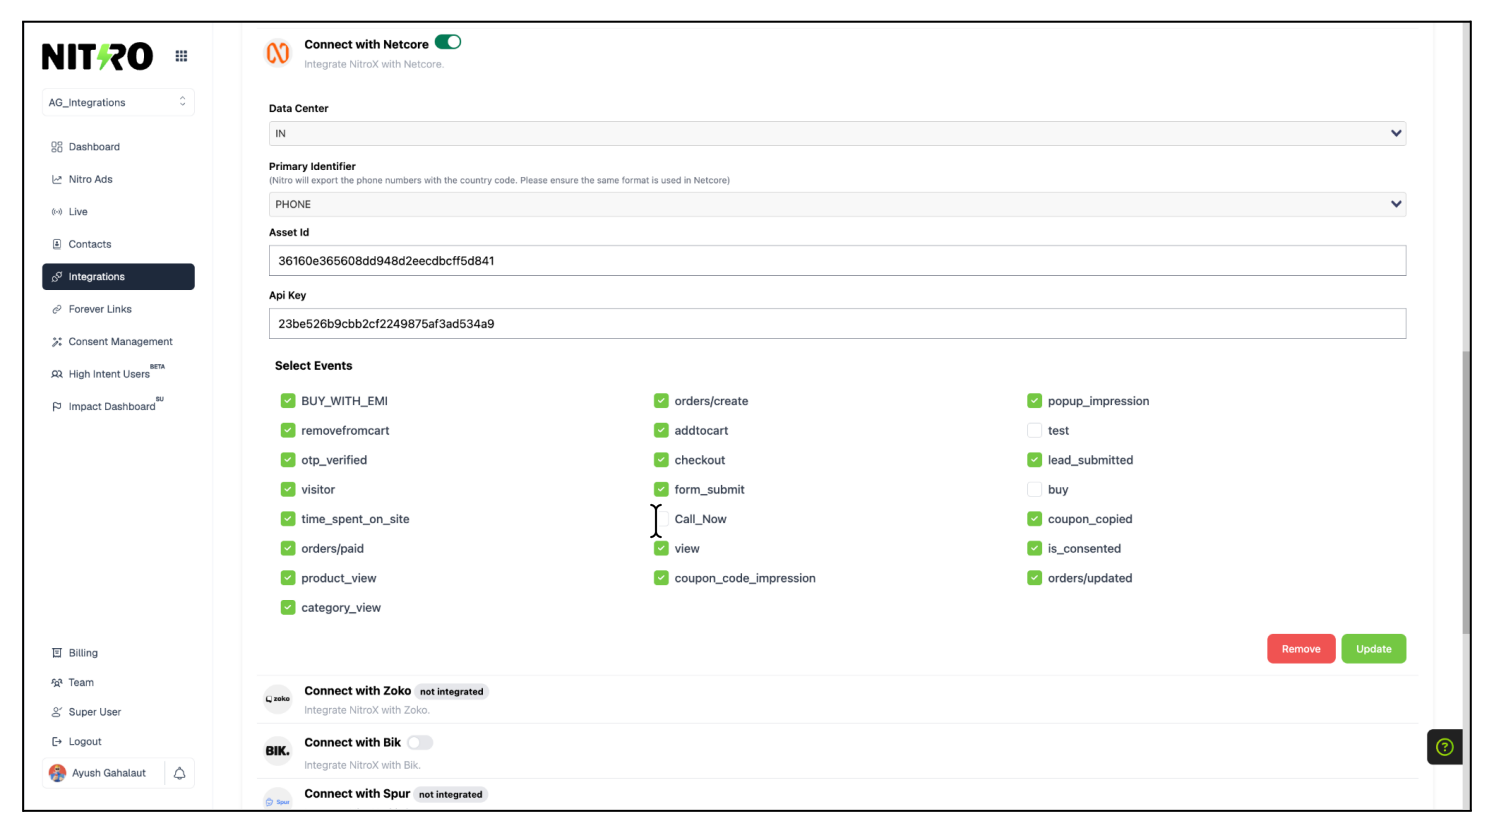
Save Integration
- Review all values.
- Click Save.
- Confirm that the Connect with Netcore toggle turns on.
NitroX now sends identified user and event data to Netcore CE.
NoteTo change the identifier, events, or credentials later, update the values in the NitroX form and click Update. To disconnect, click Remove.
What NitroX Sends to Netcore CE
Contacts
When NitroX identifies a customer, it sends the following contact attributes.
| Attribute | Description |
|---|---|
NAME | Name of the customer. |
EMAIL | Email address of the customer. |
MOBILE | Mobile number of the customer. |
NITRO_ID | The unique Nitro identifier of the customer. |
Events
NitroX sends website events with the nitro_ prefix, for example nitro_product_view and nitro_addtocart. Each event carries the contact identifier and customer details.
Verify the Integration
After you save the integration, check that data arrives in Netcore CE. See Track Nitro data in Netcore.
Troubleshooting
| Issue | What to check |
|---|---|
| No profiles appear in Netcore CE | Confirm that the integration toggle is on. Confirm that the API key and Asset ID are correct and have no extra spaces. |
| Data does not reach your account | Confirm that the data center in NitroX matches the data center of your Netcore CE account. |
| Users do not match existing contacts | Confirm that the primary identifier in NitroX matches the Customer ID in Netcore CE. For phone numbers, confirm that both systems use the country code format. |
| Events are missing | Open the NitroX integration form and confirm that you ticked the events. |
| You see anonymous profiles instead of identified profiles | You selected Anon ID. Select Phone Number or Email if your Netcore CE Customer ID uses one of them. |
FAQs
Q. Where do I find my API key in Netcore CE?
A. Go to Profile > User Profile.
Q. Where do I find my Asset ID in Netcore CE?
A. Go to Settings > Website.
Q. Do I need to change my website code?
A. No. NitroX handles on-site identification.
Q. Can I change the primary identifier later?
A. You can update the integration form. Check your Customer ID setup in Netcore CE first so that new profiles match your existing contacts.
Updated 2 days ago