
Export Events to SFTP
Send Netcore CE data to SFTP connections.
Overview
Secure File Transfer Protocol (SFTP) is a secure network protocol that transfers files over an encrypted connection.
The Netcore Customer Engagement (CE) platform allows you to export event data directly to your SFTP server. This integration automatically delivers customer interaction and engagement data to your designated storage location.
Benefits
- Enhanced Security: Encrypts data during transfer to protect sensitive customer information.
- Automated Data Flows: Schedules regular exports to keep your external systems updated automatically.
- Flexible Data Formats: Supports CSV, JSON, and Parquet formats to fit your data pipeline needs.
- Custom Transformations: Enables masking fields, renaming columns, changing field types, and reformatting dates before export.
Use Cases
- Data Archiving: Move historical engagement data to secure servers for long-term storage and compliance.
- Custom Analytics: Feed event logs directly into your internal data warehouse or business intelligence tools.
- Cross-Platform Integration: Share engagement metrics with internal operational tools without manual data extracts.
Export Events to SFTP
Follow the steps given below to send Netcore CE data to SFTP connections.
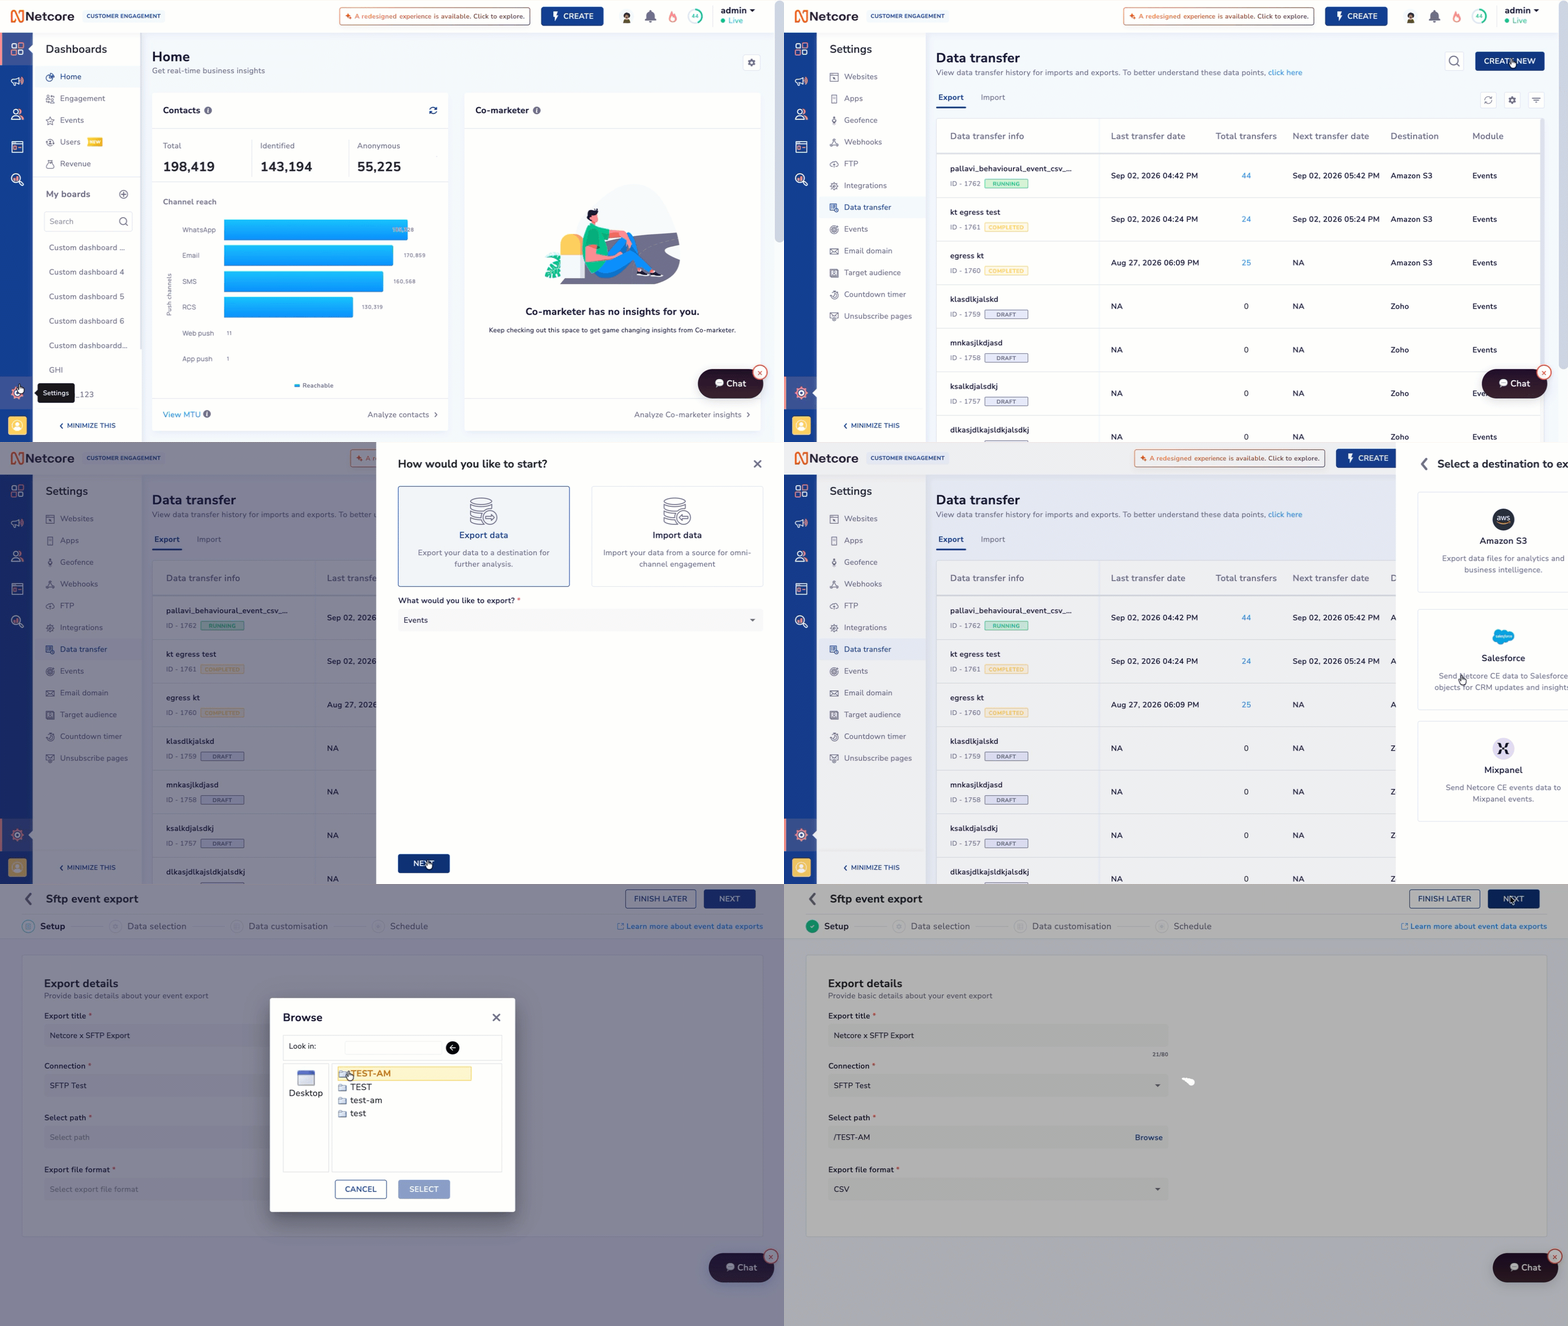
Export Events to SFTP
Step 1: Access Data Transfer
- Log in to your Netcore CE dashboard and navigate to Settings > Data Transfer.
- Click CREATE NEW in the top-right corner.
- Select Export data, select Events from the dropdown and click NEXT.
Step 2: Configure Setup Details
- Under Export destination, select SFTP.
- Enter a unique name in the Export title field.
- Select your pre-configured SFTP connection from the Connection dropdown.
- Click Browse under Select path to choose your target directory on the SFTP server.
- Choose your preferred file format from the Export file format dropdown: CSV, JSON, Parquet and click NEXT.
Step 3: Select Data Parameters
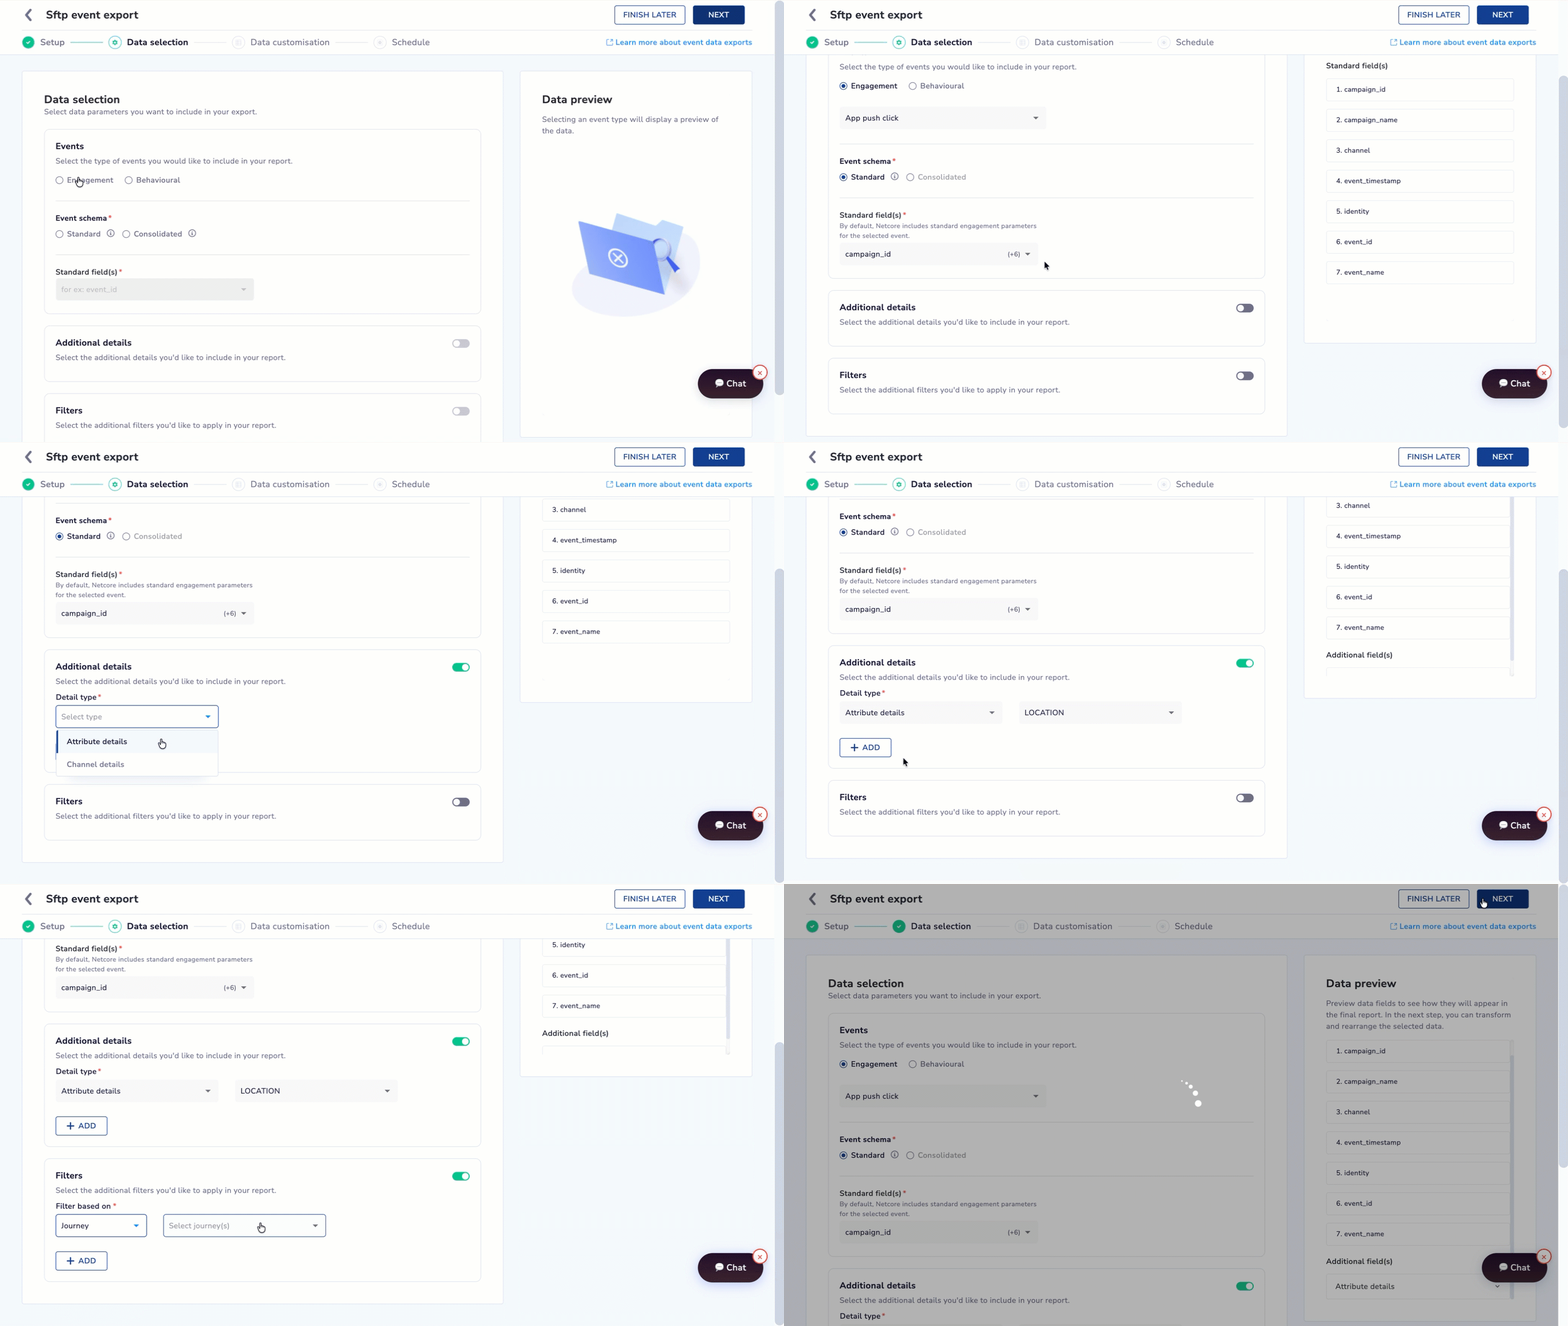
Select data parameters you want to include in your export.
- Select your event type under Events:
- Engagement: Select specific communication events like email clicks or push app notifications.
- Behavioural: Select user activity events on your website or application.
- Select the Event schema:
- Standard: Generates separate files for each event type.
- Consolidated: Merges all selected events into a single file structure.
- Select your required Standard field(s).
- Enable additional details or custom filters if needed.
- Review the arrangement of your fields in the Data preview pane on the right.
- Click NEXT.
Step 4: Apply Data Customization (Optional)
- Toggle the Transformation switch on to apply data modifications.
- Click + ADD to create a transformation rule:
- Mask field: Obscures sensitive values in chosen fields.
- Rename column: Changes the name of the column header.
- Field to string: Converts data types to string format.
- Date format: Modifies the timestamp format.
- Select the target field for each transformation.
- Click SEND TEST DATA to send a sample file and test your setup.
- Click NEXT.
Step 5: Set Export Schedule
- Select the start date/time using the date picker.
- Select the End date/time to define when the automated export stops.
- Select the export Frequency (e.g., Daily, Weekly, or Hourly).
- Click SAVE or FINISH to activate your SFTP data export schedule.
Updated 2 days ago
Did this page help you?