
Import Contacts from Snowflake to Netcore
Import Snowflake contact data to power targeted campaigns and journeys in Netcore CE.
Overview
A Contacts import moves contact records from a Snowflake table or view into Netcore CE. You choose the Snowflake connection, warehouse, database, schema, and table. You map the table columns to Netcore CE attributes. You then run the import once or on a recurring schedule.
| Item | Detail |
|---|---|
| Source | Snowflake |
| Destination | Netcore CE contact master, and optionally one or more lists |
| Location in Netcore CE | Settings > Data transfer > Import |
| Wizard | Snowflake contact import, with Setup, Data mapping, and Schedule steps |
| Required identity mapping | EMAIL (Primary key) and Updated on |
| Attributes mapping | Yes |
| Schedule options | One-time or Recurring |
Pre-requisites
- An active Snowflake connection in Netcore CE. See Snowflake.
- Read access to the Snowflake warehouse, database, schema, and table or view you want to import from.
- At least one email address to receive import alerts.
- The Netcore CE list that you want to add contacts to, if any.
Refer to Import Data from Snowflake to Netcore to learn the steps to start a Contacts import.
The Snowflake contact import wizard opens. Click FINISH LATER at any point to save your progress.
Step 1: Setup
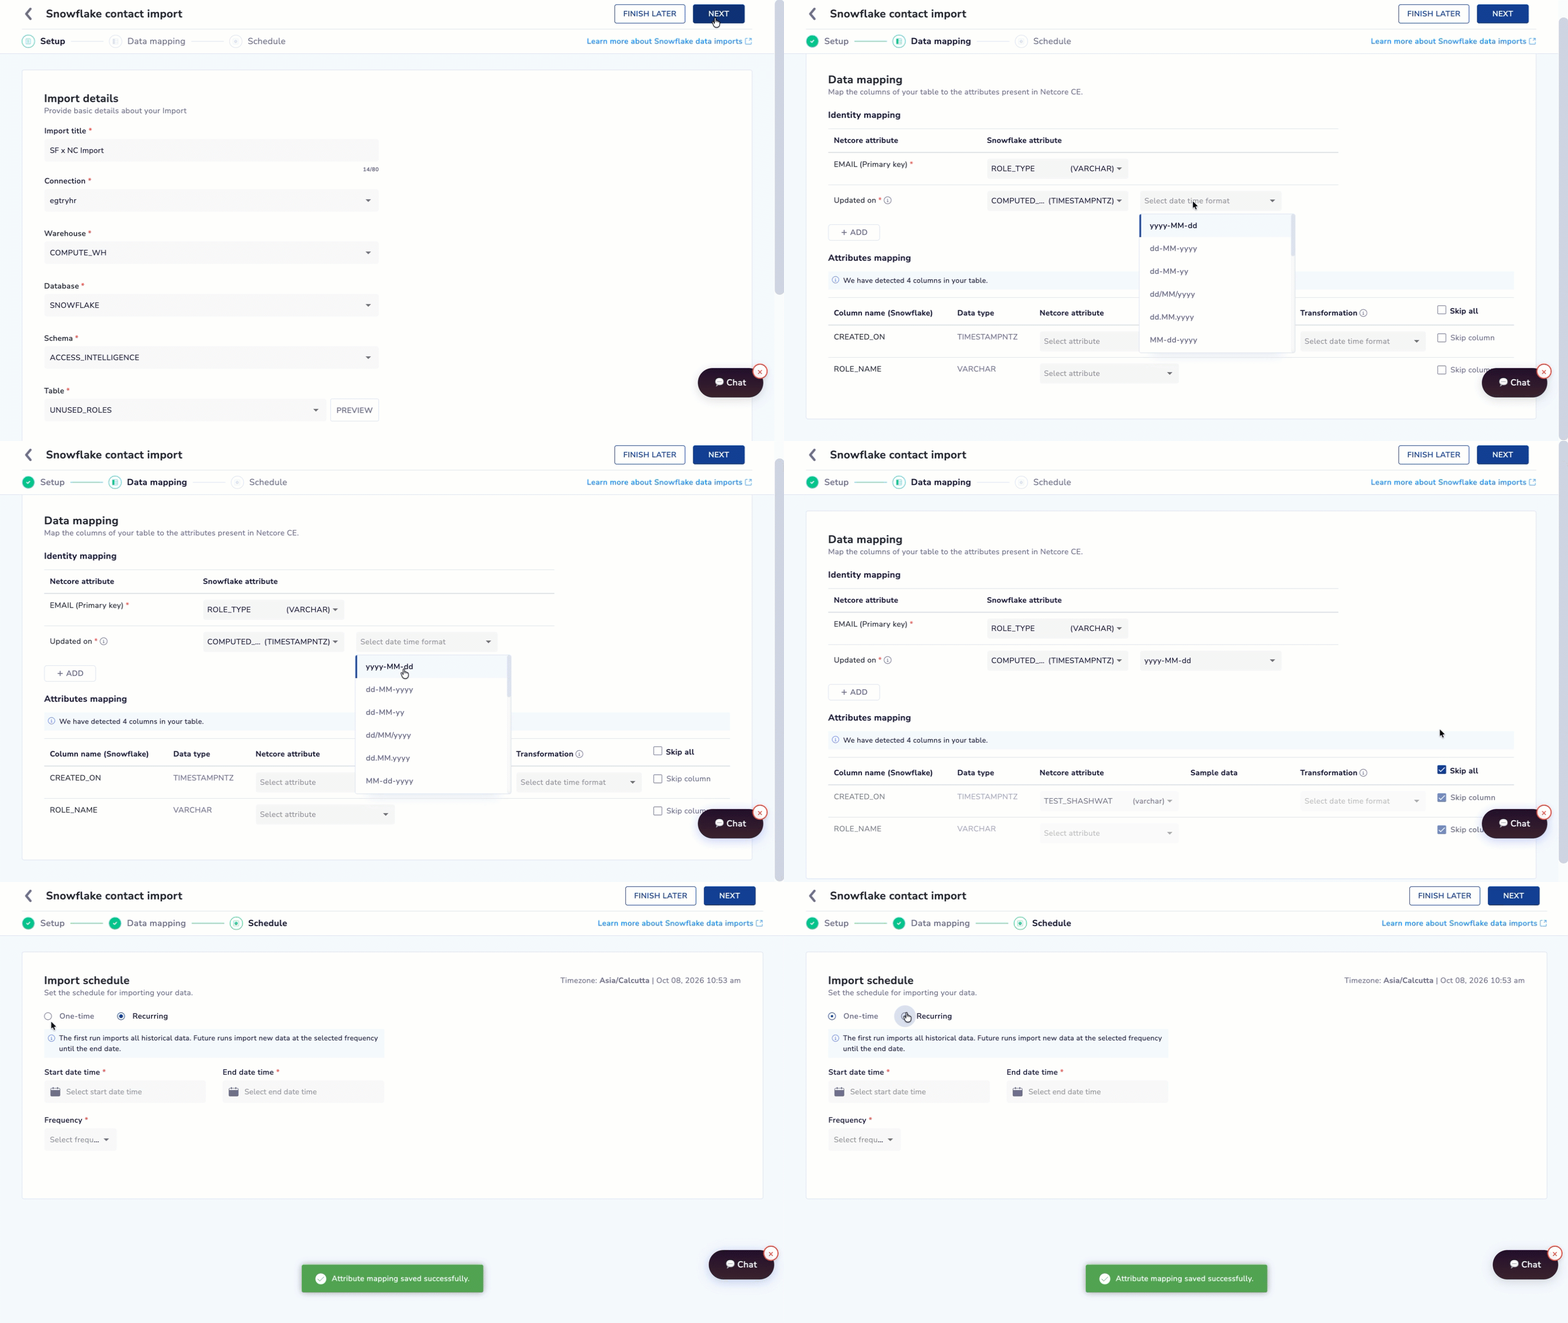
Provide basic details about your Import
The Import details section asks for the basic details of your import.
| Field name | Description |
|---|---|
| Import title | A unique name for this import. Up to 80 characters. |
| Connection | Select an existing Snowflake connection that you created under Integrations. |
| Warehouse | Select the Snowflake virtual warehouse to use. This field appears after you select a connection. |
| Database | Select the database to import from. This field appears after you select a warehouse. |
| Schema | Select the schema within the selected database. This field appears after you select a database. |
| Table | Select the table or view to import contacts from. This field appears after you select a schema. |
| Type of users | Choose Identified or Anonymous for the imported contacts. |
| Import contact to list(s) | Optional. Netcore CE adds contacts to the contact master by default. You can also add them to one or more lists. |
| Alert email | Select the email addresses that receive alerts about this import. |
After you select a table, click PREVIEW to open "Table preview" with a few sample records. Netcore CE shows this note: "Sample records are shown to help you verify the data. Please perform a quick sanity check before proceeding with flow activation." Use the preview to confirm that you picked the right table. Then click NEXT. Netcore CE saves your setup details.
Step 2: Data Mapping
This step maps the columns of your Snowflake table to Netcore CE. A Contacts import has two sections: Identity mapping and Attributes mapping.
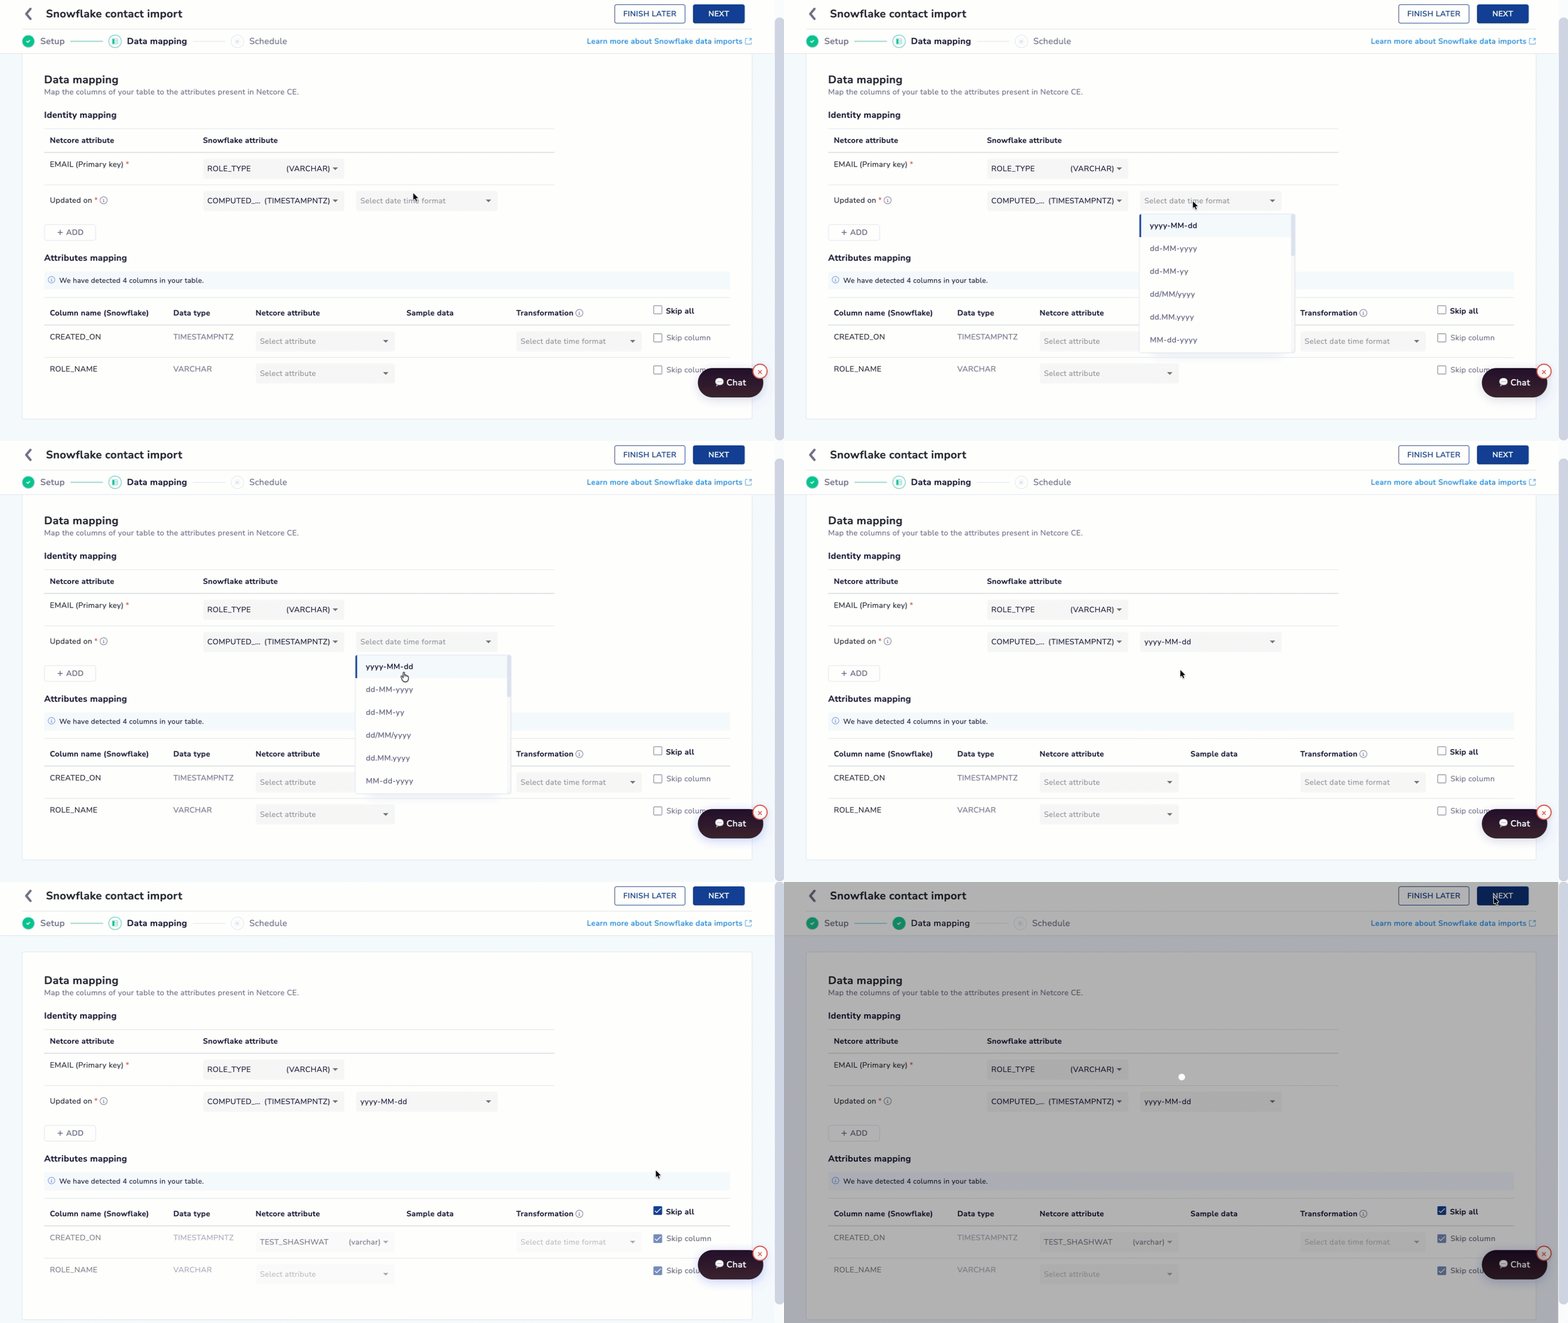
Map the columns of your table to the attributes present in Netcore CE.
Identity Mapping
Identity mapping tells Netcore CE which Snowflake column to use to match and update contact records.
| Netcore attribute | Requirement |
|---|---|
| EMAIL (Primary key) | Required. Map it to the Snowflake column that uniquely identifies each contact. |
| Updated on | Required. Map it to the Snowflake column that stores when a record was last updated. |
Click + ADD to add more identity mapping rows.
When you map Updated on, a date time format dropdown appears. The available formats include:
YYYY-MM-DDYYYY/MM/DDDD/MM/YYYYDD-MM-YYYYDD-MM-YYYY hh:mm:ssYYYY-MM-dd HH:mm:ss.SSS XX
Validation: If the column mapped to Updated on is not a timestamp type, or if you skip the date time format, Netcore CE outlines the field in red. Clicking NEXT shows the error "Please select a date-time format for 'Updated on'." Correct this before you continue.
Attributes Mapping
Netcore CE shows a note: "We have detected [N] columns in your table." The count excludes the columns that Identity mapping uses. For each detected column, Netcore CE shows:
| Column | Description |
|---|---|
| Column name (Snowflake) | The source column name, for example CITY or SIGNUP_TIMESTAMP. |
| Data type | The Snowflake data type, for example VARCHAR, TIMESTAMPNTZ, or TIMESTAMPTZ. |
| Netcore attributes | A searchable dropdown of existing attributes with compatible data types. |
| Sample data | An example value from the previewed table. |
| Transformation | For timestamp columns, a Select date time format dropdown. |
| Skip column | A checkbox that excludes the column from this import. |
Use Skip all to check or clear every Skip column checkbox at once.
Create a New Netcore Attribute
If no existing Netcore CE attribute matches a column, open the Netcore attributes dropdown and select + Create attribute. You create the attribute without leaving this screen.
Validation: You must map every detected column to a Netcore attribute or mark it as Skip column. If a column stays unresolved, clicking NEXT shows the error "Please map or skip the columns you don't wish to import." Resolve every row before you continue.
Click NEXT to move to Schedule. Netcore CE saves your attribute mapping at this point.
Step 3: Schedule
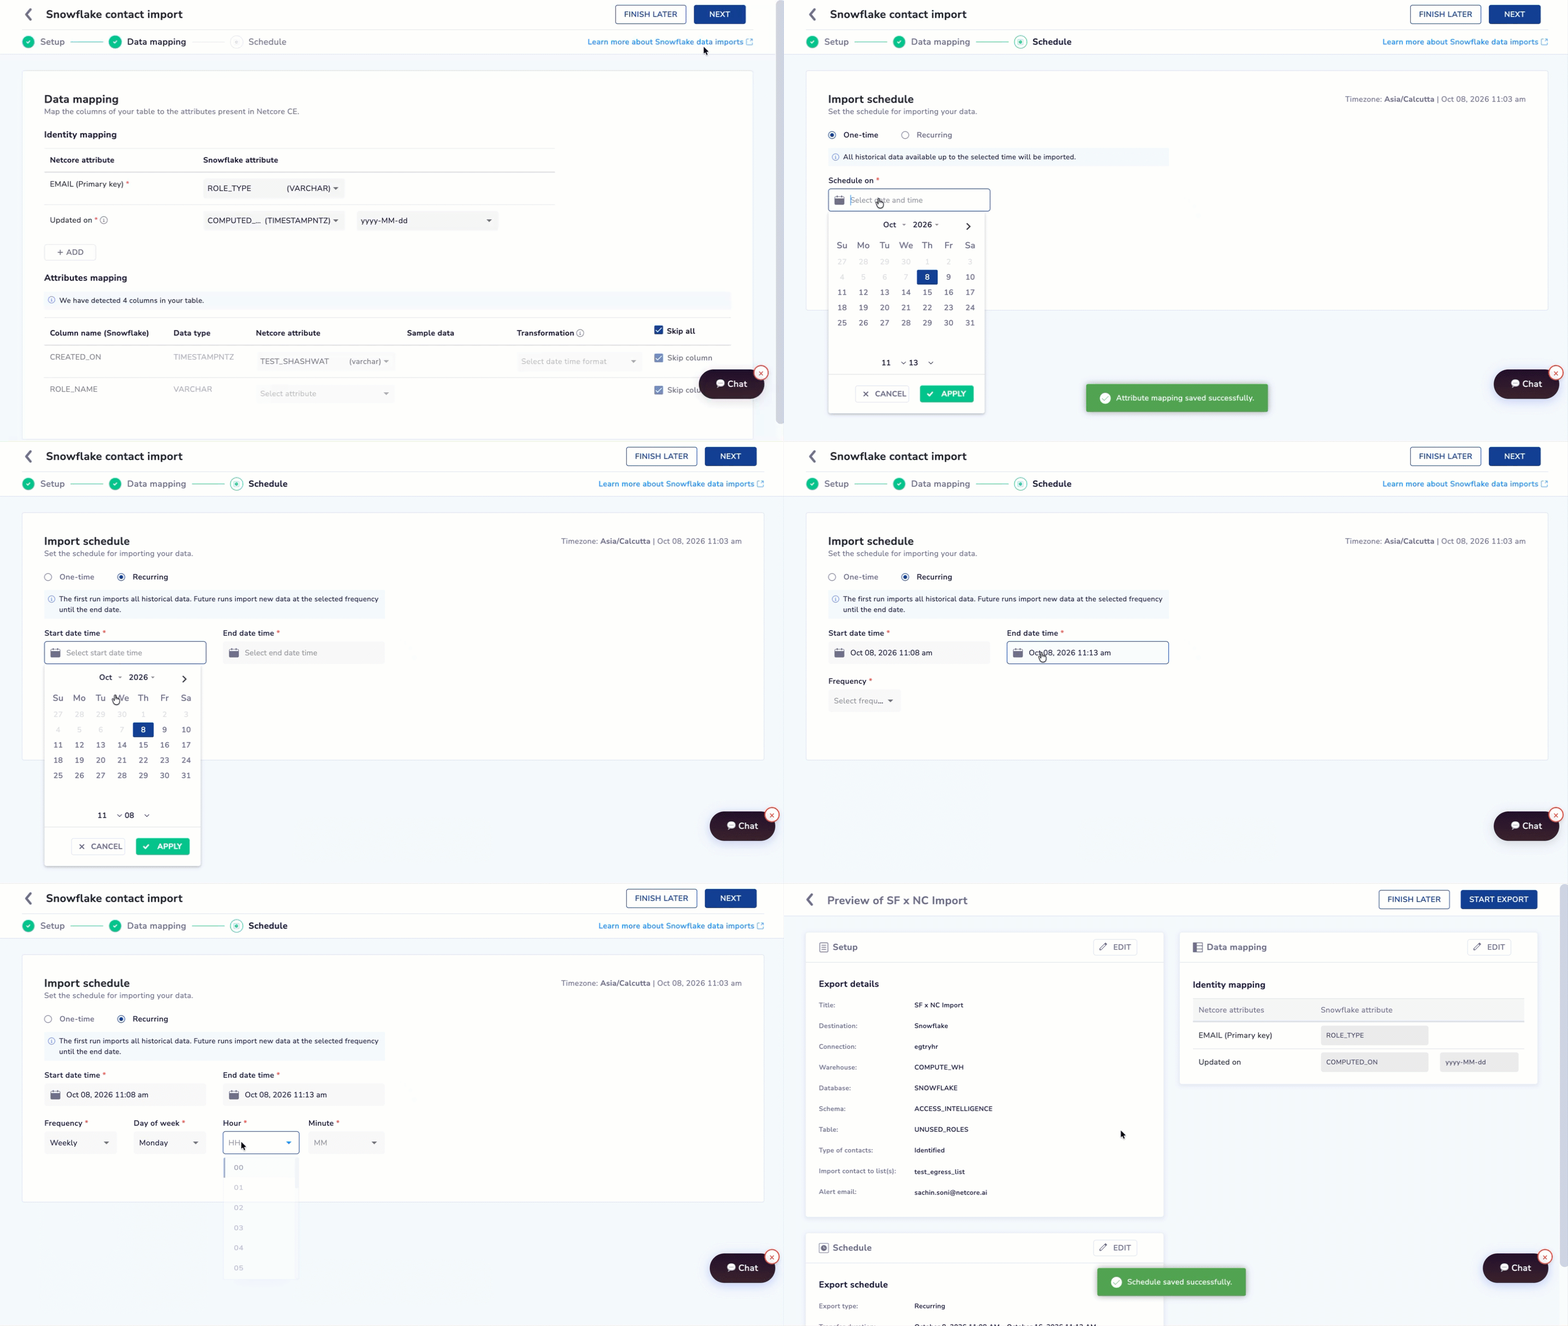
Set the schedule for importing your data
The page shows your account timezone and the current date and time. Select one of two options:
| Option | Behavior | Fields |
|---|---|---|
| One-time | Netcore CE transfers the complete dataset once. It performs no incremental transfer. | Scheduled at |
| Recurring | The first run transfers the complete dataset. Later runs transfer incremental data. | Start date time, End date time, Frequency (for example Every hour or Weekly) |
Error Handling
| Error message | Cause |
|---|---|
| "Please select a date-time format for 'Updated on'." | The Updated on mapping has no date time format, or its column is not a timestamp. Select a format. |
| "Please map or skip the columns you don't wish to import." | A detected column is neither mapped nor marked Skip column. Resolve every row. |
Related Pages
Updated about 23 hours ago